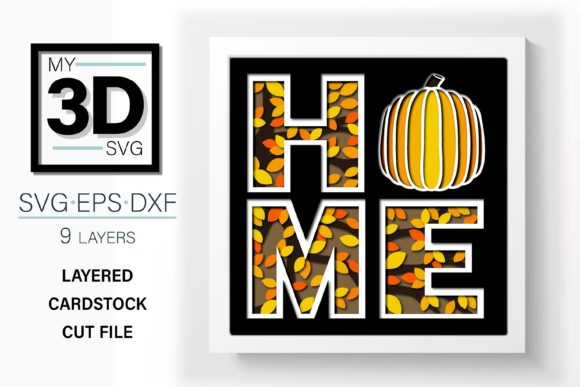
3D Fall Home
There is a specific kind of magic that happens when paper transforms from a flat sheet into a dimensional object. It catches the light differently, casts subtle shadows, and invites touch in a way that digital images never can. For crafters and designers alike, 3D Fall Home represents more than just a seasonal decoration; it is a testament to the power of layered design and precision cutting. This particular project leverages the depth inherent in multi-layered SVGs to create a warm, inviting aesthetic that perfectly captures the essence of autumn.
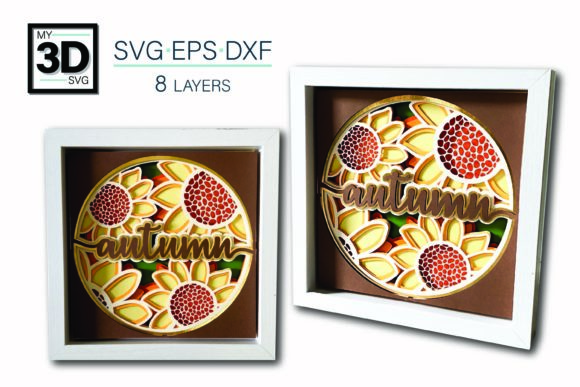
The concept behind this design is deceptively simple yet visually striking. By utilizing nine distinct layers of standard 8.5x11 cardstock, the final piece achieves a rich texture and depth that mimics the complexity of a fall landscape or a cozy interior scene. The beauty lies not just in the final product, but in the process. You are not merely cutting shapes; you are curating an atmosphere. Each layer serves a purpose, contributing to the overall narrative of the piece. Whether you are creating a centerpiece for your dining table or a unique gift for a housewarming, understanding the mechanics of this design allows you to push beyond basic templates and into true creative territory.
Understanding the Layered Advantage
At its core, the appeal of a 9-layer design like 3D Fall Home is its ability to create visual interest without requiring complex machinery or expensive materials. Standard cardstock is affordable, widely available, and easy to work with. However, the magic happens when these sheets are stacked. The shadow gaps between layers add realism, turning a simple silhouette into a scene with volume. This technique is particularly effective for autumnal themes, where the interplay of light and shadow can evoke the feeling of late afternoon sun filtering through trees.
When you engage with this file, you are working with a versatile foundation. The design is structured to allow for significant customization. While the default color palette might suggest traditional oranges, reds, and browns, the real innovation comes from experimenting with unexpected combinations. Consider using deep navy blues for the background layers to make bright yellow accents pop, or try varying shades of green to represent lingering summer leaves against the coming winter. The flexibility of the digital file means you can adjust colors before you ever pick up a cutter, allowing you to preview how different palettes affect the mood of the piece.
Technical Versatility Across Platforms
One of the strongest advantages of this resource is its comprehensive format support. Crafters often find themselves switching between different software ecosystems depending on their machine and workflow preferences. That is why receiving the file in multiple formats is crucial. The inclusion of an SVG file ensures seamless integration with Cricut Design Space, which is ideal for users who rely on the intuitive interface and extensive library of Cricut’s ecosystem. This format preserves the vector data, ensuring that curves remain smooth and lines stay crisp regardless of scaling.
For those who prefer Silhouette Studio, the provided DXF file offers native compatibility, simplifying the setup process and reducing the risk of alignment errors. Furthermore, professionals and advanced hobbyists who use Adobe Illustrator, Make the Cut, Corel Draw, or Inkscape will appreciate the EPS file. This format maintains high-fidelity vector information, allowing for precise editing of individual paths and nodes. Whether you need to resize a single leaf, adjust the spacing between layers, or combine elements with other designs, having access to the raw vector data empowers you to tailor the project to your exact specifications. This cross-platform readiness removes technical barriers, letting you focus on creativity rather than troubleshooting file conversions.
Creative Applications and Project Ideas
While the name suggests a home decor item, the applications for this design extend far beyond a simple wall hanging. Here are several ways to adapt the 3D Fall Home concept for different contexts:
- Seasonal Table Centerpieces: Instead of mounting the layers on a single board, consider separating them slightly and attaching them to clear acrylic stands or wooden dowels. This creates a floating effect that can serve as a stunning centerpiece for a Thanksgiving dinner. The depth adds elegance without obstructing conversation across the table.
- Gift Tag Enhancements: Scale down the design for smaller projects. Use thinner cardstock or even vellum for the top layers to create delicate, translucent tags for gift baskets filled with autumn-themed treats like spiced candles, tea blends, or homemade jams. The layered look adds a premium feel to small gifts.
- Window Clings and Décor: If you have access to adhesive-backed vinyl or transparency film, you can replicate the layered effect on windows. The sunlight passing through the colored layers will cast beautiful, colorful shadows inside your home, changing throughout the day as the sun moves.
- Scrapbooking and Journaling: Break the design apart. Use individual layers as embellishments in physical scrapbooks or bullet journals. The dimensionality adds a tactile element to page layouts, making memories feel more tangible and preserved.
Practical Tips for Execution
To achieve the best results with your 3D Fall Home project, attention to detail during the assembly phase is key. Start by organizing your materials. Pre-cut all your cardstock sheets and sort them by layer number. Using a bone folder to score the folds (if applicable) or simply ensuring clean edges on each cut will significantly improve the final appearance. When gluing, use a fine-tip applicator to avoid excess adhesive seeping out and marring the visible surfaces. A strong, quick-drying glue stick or liquid craft adhesive works well, but test on scraps first to ensure compatibility with your chosen cardstock weight.
Consider the lighting in your display area. Since the design relies on shadows and depth, placing it near a window or under a focused lamp can enhance its visual impact. Experiment with backing materials as well. While white cardstock provides a clean, modern contrast, a dark charcoal or textured kraft paper background can ground the brighter colors and give the piece a more rustic, earthy vibe. Don’t be afraid to mix textures; combining smooth matte cardstock with a slightly textured finish on one of the middle layers can add another dimension of sensory interest.
Maintaining Consistency and Originality
As you refine your skills with layered designs, consistency becomes your ally. Keep a record of the color combinations and layer orders that work well for you. Create a "cheat sheet" or digital note documenting your successful palettes. This practice saves time on future projects and helps build a cohesive collection of seasonal décor. However, originality should always take precedence over repetition. Use the 3D Fall Home structure as a springboard. Once you are comfortable with the nine-layer system, try adapting the same technique to other themes—perhaps a winter wonderland, a spring garden, or even a personalized monogram for a wedding.
The joy of crafting lies in the iteration. Every cut is a decision, every color choice a statement. By embracing the versatility of the included file formats and the flexibility of the design itself, you transform a simple digital download into a meaningful, handmade artifact. Whether you are a seasoned pro looking for a new challenge or a beginner eager to explore the world of 3D paper crafts, this project offers a rewarding balance of technical satisfaction and artistic expression. Let your creativity guide you, and watch as flat paper turns into a vibrant celebration of the season.